
We’ll explain how to enable battery saver in Windows 11.
A laptop is designed to be portable, but without power nearby, it’s useless. Those who often work on the go know how important it is to get the most out of their battery. Windows 11 includes a built-in feature to help with this: battery saver.
Battery saver automatically reduces your screen brightness and limits background processes that consume a lot of energy. Think of automatic updates, synchronizations, or apps that remain unnecessarily active while you’re not using them. Your device remains usable but consumes less power. Ideal when you know you need to make it to the next power outlet.
In this guide, we show you how to manually enable battery saver and how to set it to automatically activate at a low battery level.
-
Step 1: Open the Settings
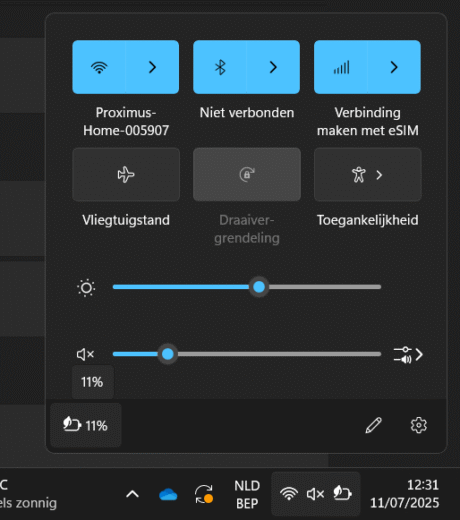
Click on the battery icon in the taskbar and then click on the battery icon again in the menu at the bottom left.
-
Step 2: Go to “Battery”
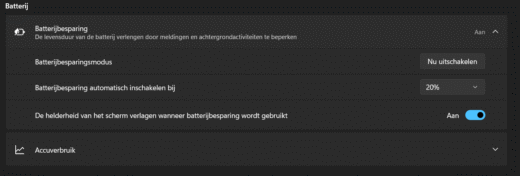
Scroll down until you find the section Battery.
-
Step 3: Turn on Battery Saver
Under the heading Battery Saver, click the button Turn on now.
-
Step 4: Set Automatic Activation (Optional)
Click the arrow next to Battery Saver to show additional settings. Here you can set battery saver to automatically activate below a certain battery percentage, such as 20 percent.