
Windows has a built-in backup tool that allows you to duplicate your entire PC. Useful when switching to a new device, or to build in extra security.
Nobody today would deny the importance of backups (we hope). Backups play a crucial role in modern security. There are various tools that help you create backups in Windows, but did you know that the operating system has its own app? Windows Backup has been around for a while for private users and now there’s also a version for businesses.
With Windows Backup, you can easily create backups of files, applications, settings, and basically your entire PC. The tool also facilitates the transition to a new device, as you can easily restore the backups. Now that the end of Windows 10 is approaching, this is not an unnecessary luxury.
How do you use Windows Backup? This guide explains it step by step. We’re working with the Home version of the app.
Creating Backups with OneDrive
There are multiple ways to create backups in Windows. Microsoft is eager to push OneDrive on you. Via Account > Windows Backup in the settings, you can have your PC automatically synchronize with your OneDrive account. With every startup, files on your PC are then copied to OneDrive, as long as you have available storage memory.

OneDrive can certainly be a useful tool for creating backups, but is limited to files. With Windows Backup, you can make much more extensive backups. Think of settings, login credentials, and applications. That makes it a bit strange that Microsoft hides the app.
Creating Backups with Windows Backup
That’s why we recommend using the Windows Backup tool. You can make a copy of your entire PC. It’s linked to your Microsoft account, allowing you to easily restore the backup on another PC.
-
Step 1: Synchronize Account
You can easily find Windows Backup via the search function in Windows. First, check if you’re logged in with the correct Microsoft account. When opening the app, you also need to synchronize your Microsoft account with Windows to be able to transfer the backup.
-
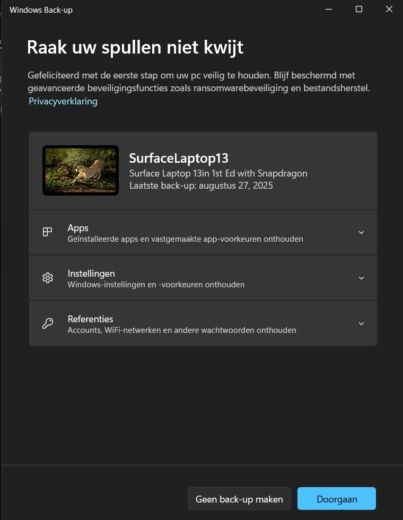
Step 2: Prepare Backup
Now you’ll see a dialog box where you can set what you want to back up. There are three choice menus:
- Accounts: installed apps and app preferences
- Settings: personal Windows settings and preferences
- Credentials: accounts, passwords, and saved Wi-Fi networks
Note: using this method, you’re still limited to the storage included in your Microsoft account. For free accounts, this is 5 GB. If your backup exceeds that limit, you’ll need to purchase additional storage to duplicate everything.
-
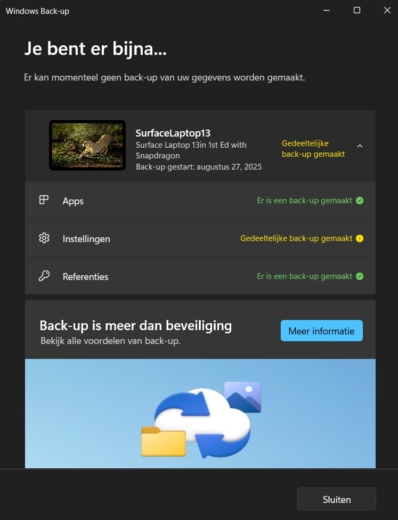
Step 3: Execute Backup
Now simply click Continue to start the backup. Depending on the amount of GB, this takes from a few seconds to minutes. To keep you busy, Microsoft adds a link to a webpage that explains the benefits of backups. Or you can read our backup guide in the meantime.
Is the backup ready? Expand the menu to check if everything has been transferred. A yellow or red symbol indicates that the backup was only partially successful or failed.
-
Step 4: Restore Data
Do you have a new PC? Then you can transfer all your data from your previous device. Log in to your new device with the same Microsoft account that you linked the backup to. During the setup of your new PC, Windows will still recognize the old device. Click Restore from this PC when the option appears.